Posted on Leave a comment

Indigo Update!

Deep Into Indigo Retreat Westby Wisconsin Shibori

My plan for the Deep Into Indigo Retreat is to teach shibori techniques of many kinds, batik techniques and how to make henna, fructose and iron vats and to dye, dye dye!!! And also to -with the help of the awesome Jenina Mella - feed people well in a beautiful and warm environment and bring the fun!! I hope you'll join us. Early bird pricing ends on June 15th!!! Check my bio for the link. Today, I'm dyeing fat quarters on this beautiful summer day. #blog | June 08, 2017 at 11:04AM
My plan for the Deep Into Indigo Retreat is to teach shibori techniques of many kinds, batik techniques and how to make henna, fructose and iron vats and to dye, dye dye!!! And also to – with the help of the awesome Jenina Mella – feed people well in a beautiful and warm environment and bring the fun!!

I hope you’ll join us. Early bird pricing ends on June 15th!!! 

Today, I’m dyeing fat quarters on this beautiful summer day. #blog

Posted on 4 Comments

Pojagi Tutorial with bonus ironing

 I can’t be forever dyeing!  Sometimes I like to dig into old news.  A nice big pile of linen can be seriously inspiring.
So are these gorgeous pojagi.  Not really quilts, though pieced like one, a pojagi is a Korean wrapping cloth.  I was suddenly struck with how ugly the curtain on the door to the garage was. It’s been there as long as we’ve owned the house and has always escaped my notice.  It’s a perfect storm!  Drop everything and MAKE STUFF!!
Notice the aluminum square to the left of the pile.  I cut it up with scissors every now and then to sharpen the blades.  It worked for a short time and was helpful because my scissors are overdue for a sharpening.  But I digress – Check out those orange pants.
 They were at my local thrift shop and I had to have them.  They were 100% linen, Ralph Lauren and PINK.  I thought I could dye them brown but stupidly picked up the terra cotta dye (WHY?) and they went horribly orange and – even if I had grabbed brown – fatally splotchy.   I put them into storage for years.
This is one of the first dye jobs I ever did.  Now I know how to pre-treat fabric so it dyes evenly.  But – AND THIS IS IMPORTANT – you have to do stuff wrong first before you do it right to really learn…climbing off soap box… Also, easy come, easy go.  I can always cut things up and make them into something else.
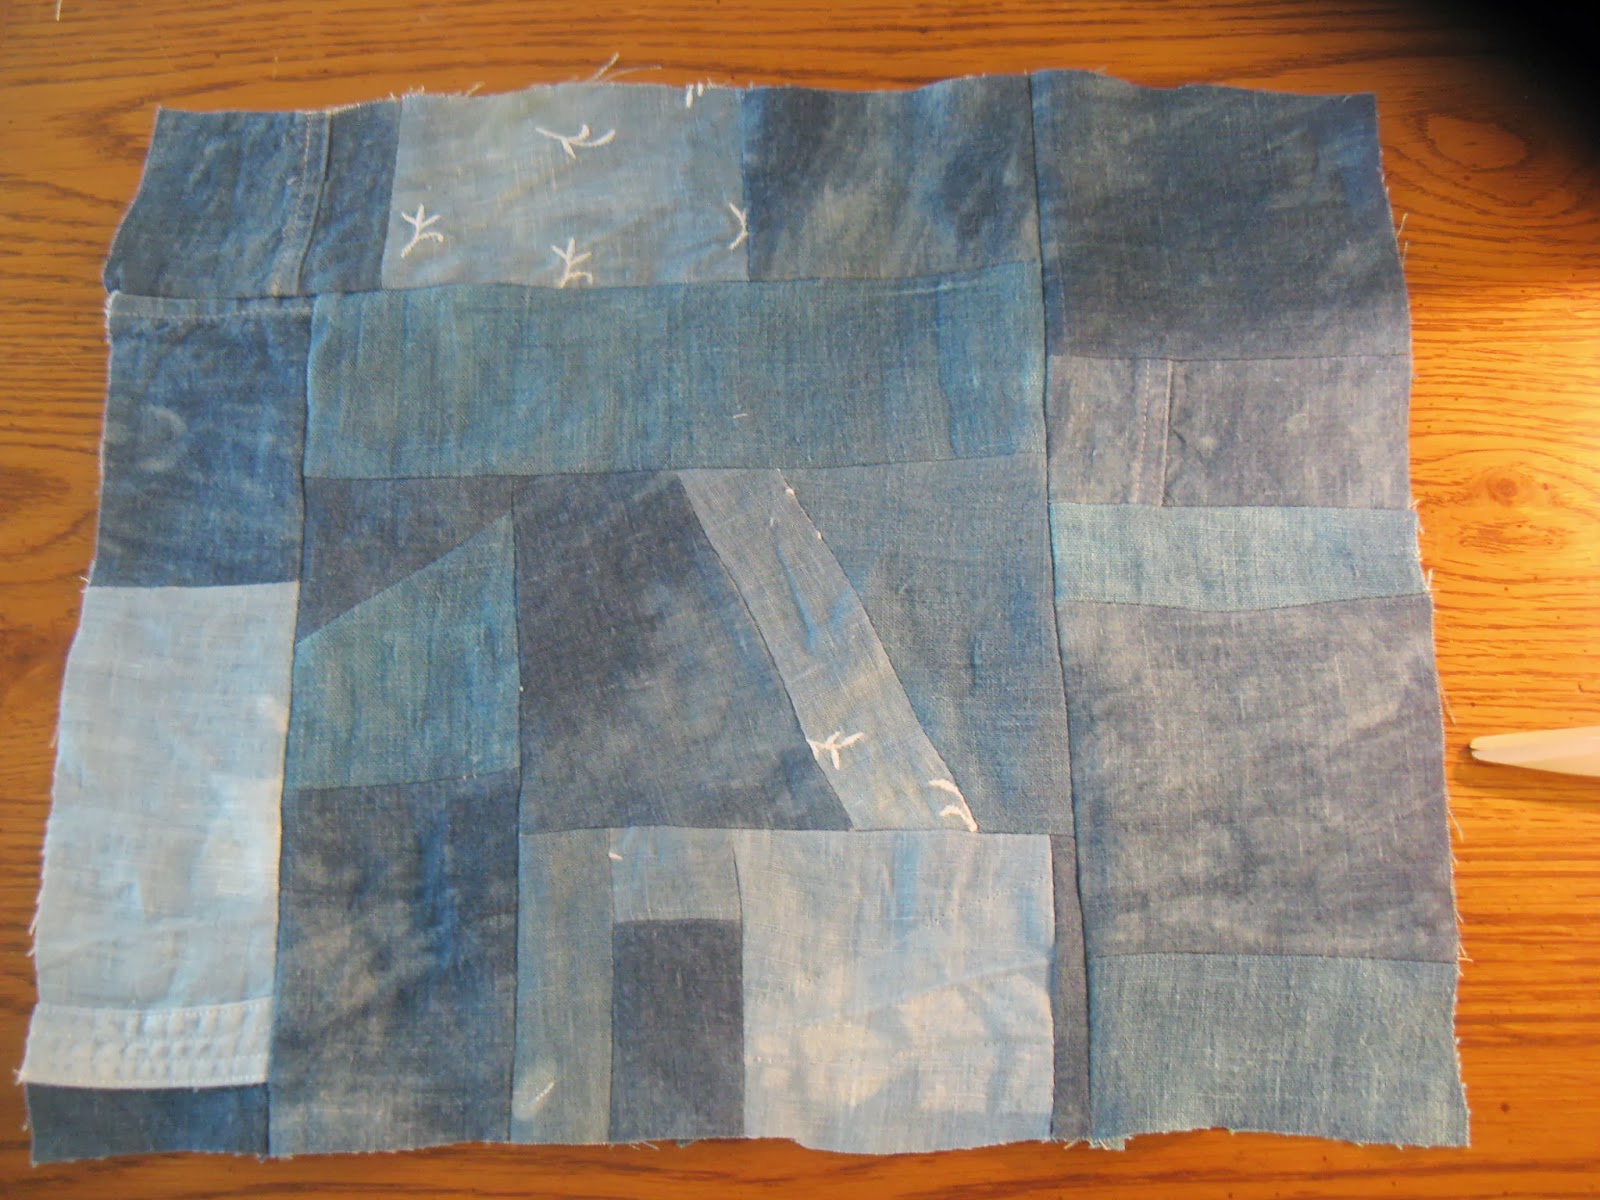
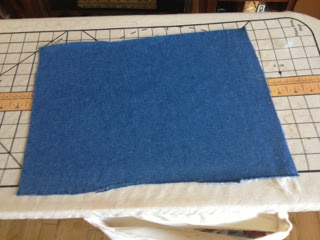
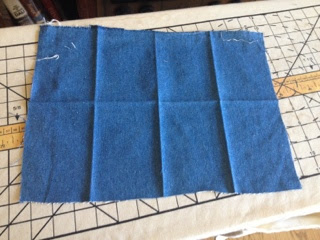
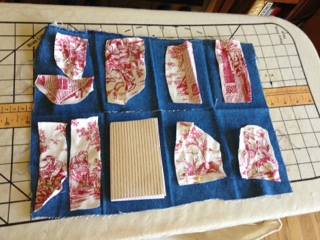
 So, I cut up several linen pieces (5 pairs pants, 1 red dress, 1 white shirt, 1 orange top) and ironed the bejeebers out of them…so satisfying to get rid of those bejeebers.  I then cut them into smaller squares without giving it too much thought.  I wanted random sizes for a crazy quilt look.
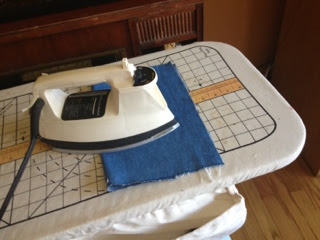
Here’s a quick tute on how to make an enclosed seam:
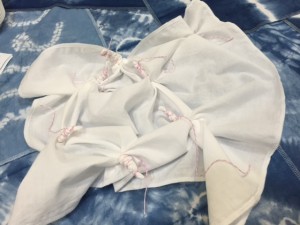
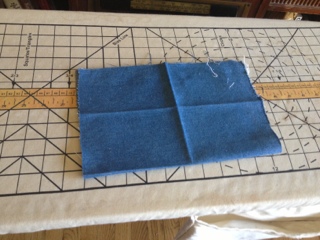
One of the many cool things about pojagi‘s is that they have no wrong side.  I think this kind of seam is called  a flat felled seam but feel free to correct me.  I layered the square on top about 1/2 inch lower than the edge of the bottom square.
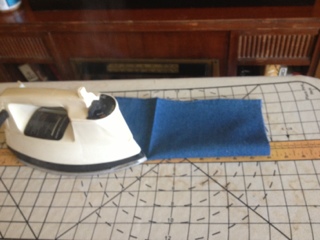
 I sewed the seam down at about 1/4 down from the edge of the top square.
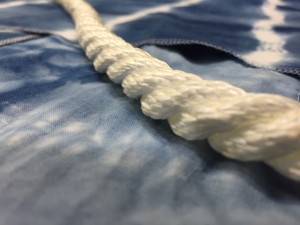
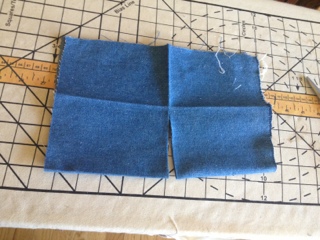
 There is a whole lot of ironing involved with this process but linen is happy to be ironed.  I ironed the overlap from the bottom square into the seam allowance.
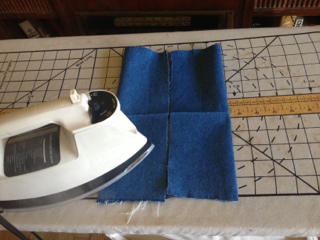
 Like so.
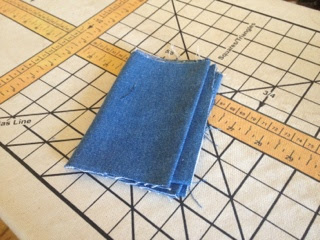
 Then I sewed along the ironed under edge and voila!  A completely enclosed seam.  For consistency’s sake, I call this the wrong side
 Here’s the right side.  Time to iron it again to give it a clean look.  I’m not gonna lie, I get a lot of satisfaction from ironing linen…I love you, linen.  Sorry, that should have been private. Anyhoo, I actually messed that up once or twice so I have some wrong side seams on my right side and vice versa but it’s a very forgiving process.  I made several panels and then sewed all those together using the same seam.  It was time consuming but I love the result:
 
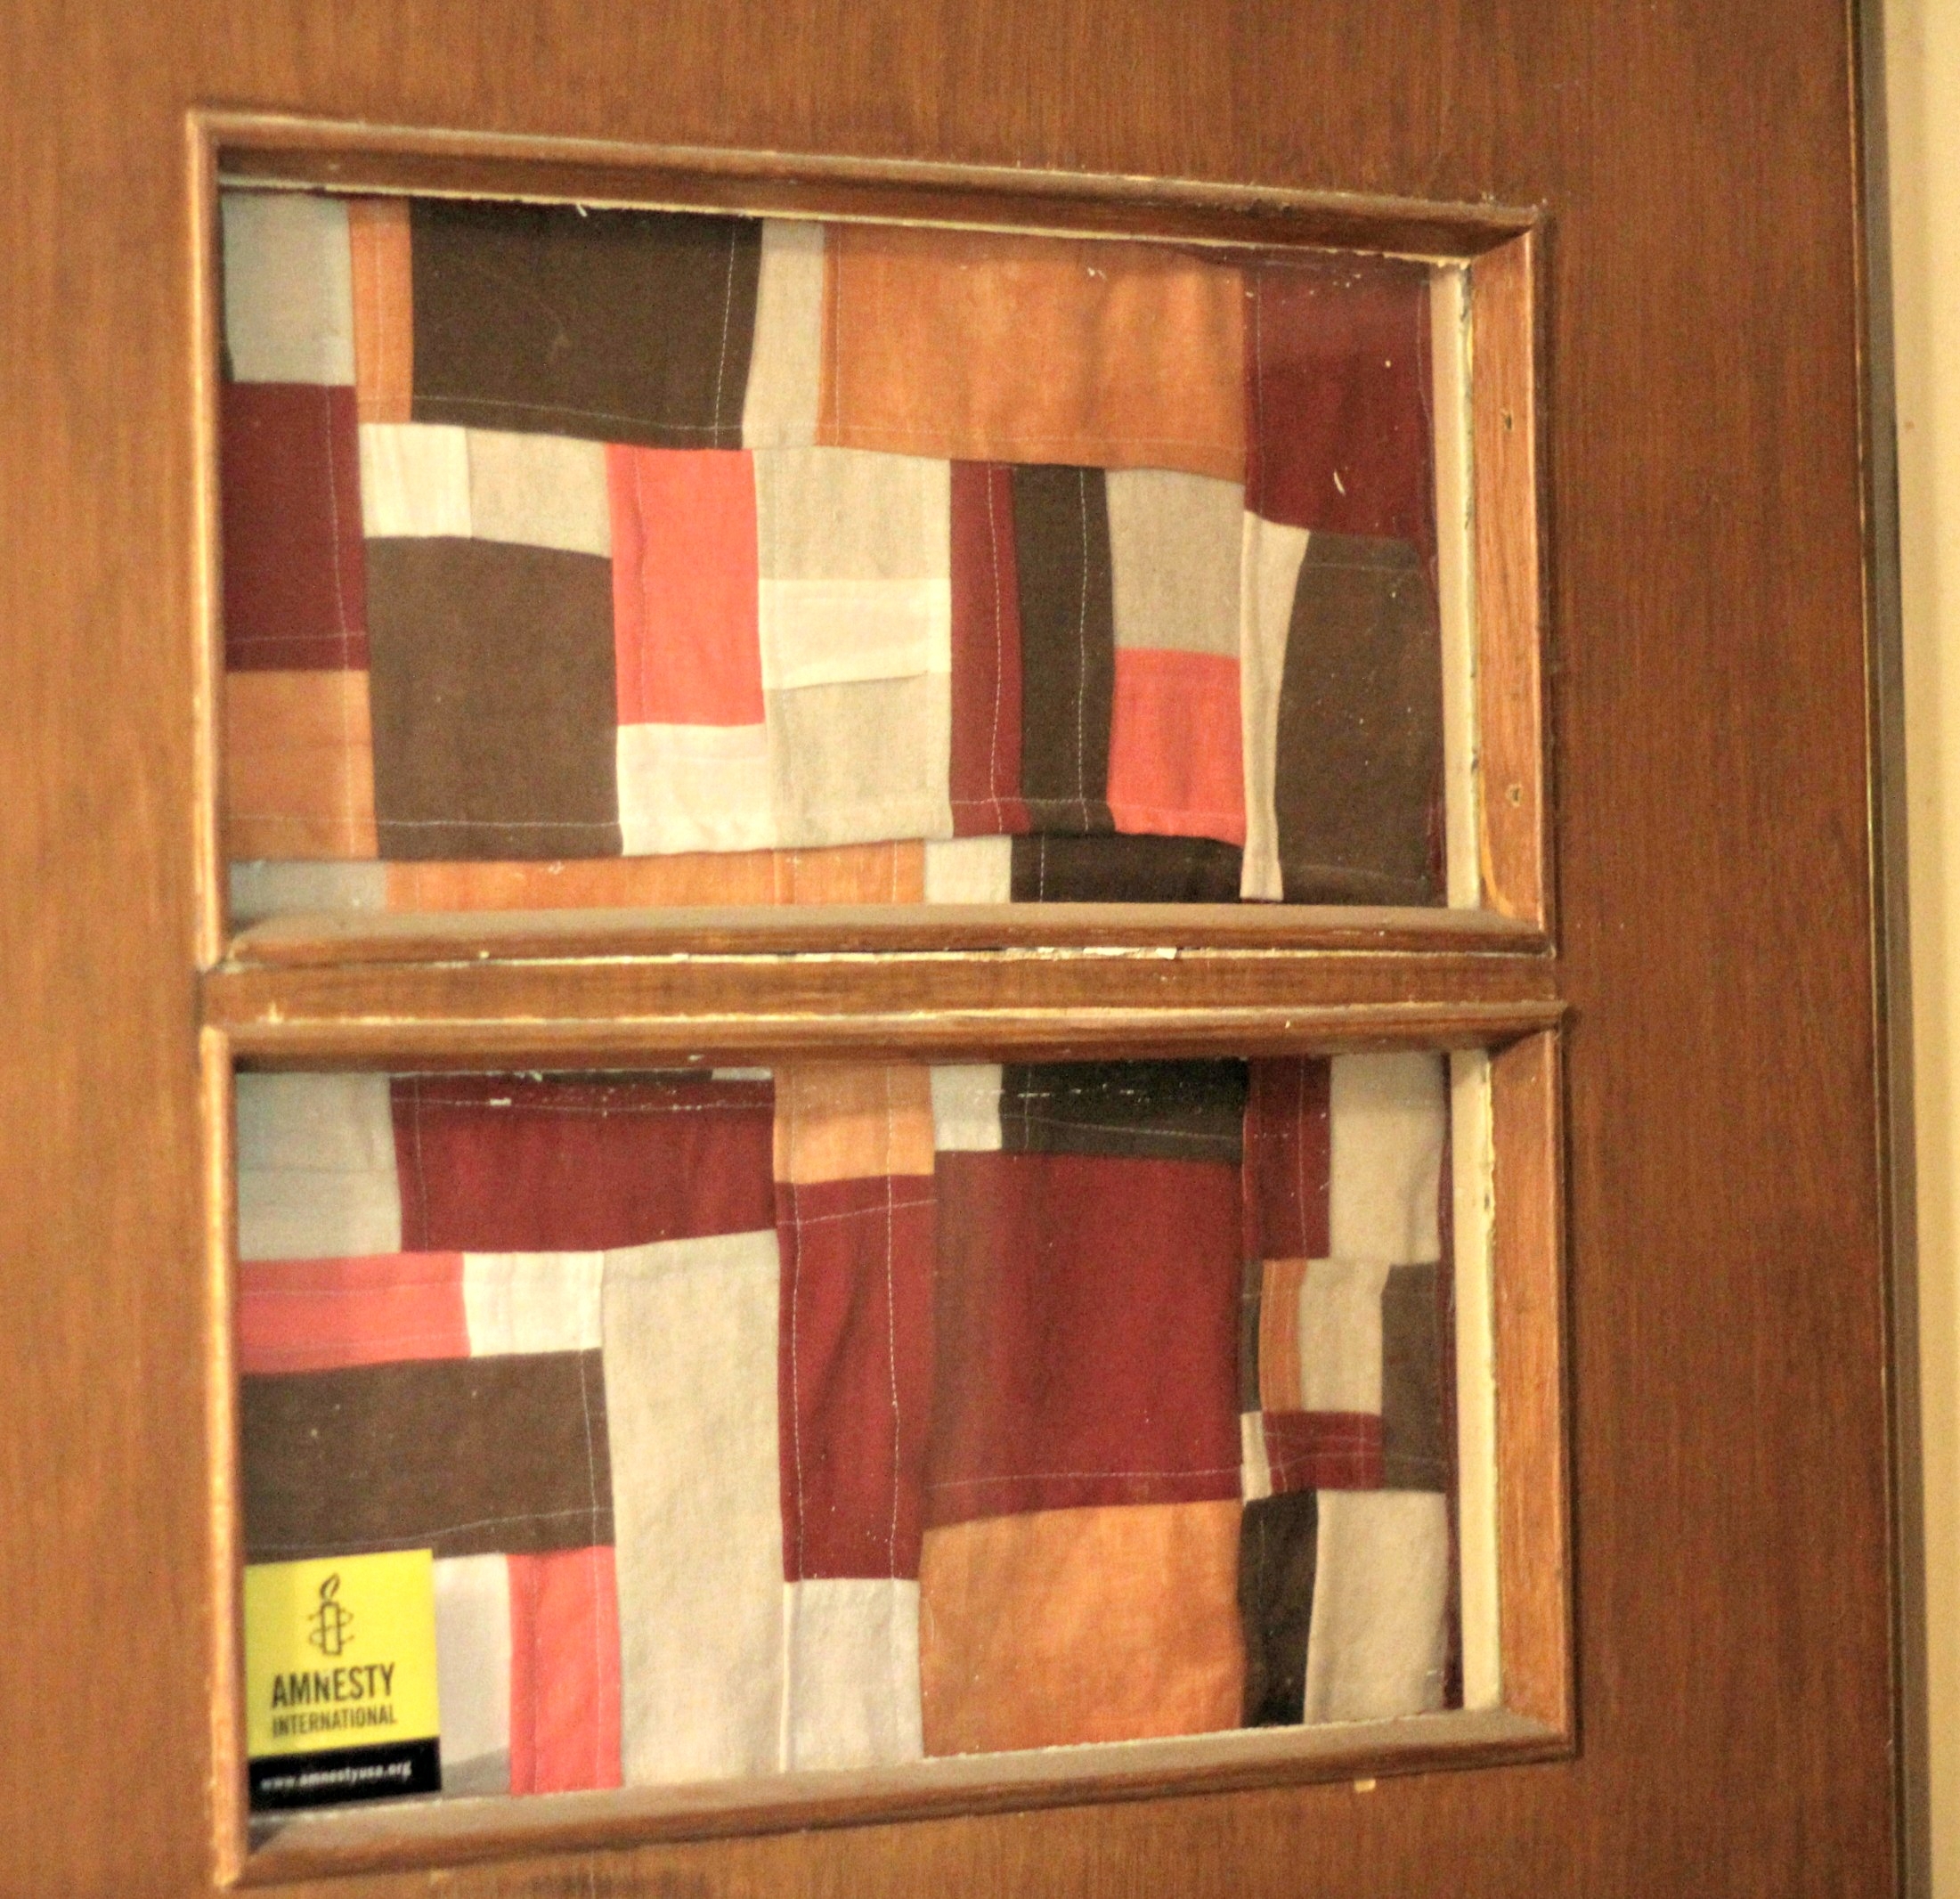
Tada!  The Final Curtain.  I rushed the end – it was dinner time – so the top is messy.  I should, and one day may, redo it but I’m just going to leave it for now.  It makes me happy.
 
 Here’s one of the other cool things about pojagi, because they are not quilted – they don’t have to be because the seams are totally enclosed – they are as sheer as the fabric used and look amazing with the light behind them.  Perfect for curtains in a place where privacy isn’t important.  I have the best view from inside my garage.
Backside
Since that view just isn’t observed by everyone, I plan on making another for the kitchen window that looks out to the yard.
I feel like the colors have a fun ’70’s vibe. I like being able to follow my nose and make things in an intuitive way. It’s a great project for people who don’t need a plan to follow.  But, I’m sure planners could make a nice tidy pojagi, if that’s what they’re into.
Have fun with it.  I plan on making a totally indigo dyed version after November, when my month of craft sales is over.  Happy sewing…and linen ironing…mmmm..happy…
Find my adventures and lots of fun pictures at Facebook.com/jenniferdyes.  Thanks for stopping
Posted on Leave a comment

Indigo Dye Class at Paradigm Gardens!!

IMG_4756

Indigo Dye Class at Paradigm Garden yesterday!  Woohoo!  We had a blast. Check out the different colors.  The indigo dye turns from green to blue.  So beautiful.

IMG_4763

We had super fun.  The students were very experimental and adventurous.

IMG_4761

IMG_4750

Check it out.  Lovely stuff.  Most of my pictures still have lots of green in them but the fabric was all blue and white by the time they headed home.IMG_4748

I have more classes coming up soon. The guys are Paradigm are so awesome, they’re letting me stay and dye some more.

IMG_4746

I’m changing the classes up a bit.  No longer will there be a separate 101 and 102 class but just a free for all kind of class.

IMG_4741

I’ll supply some fabric but you can feel free to bring a shirt or something vaguely shirt sized or about a yard or two of fabric.

IMG_4740

Check out that shocked and happy look on her face.  She was very happy with everything she made.

IMG_4739

She was not the only proud dyer that day.

IMG_4737

More details about future dye classes here.

Posted on Leave a comment

Willow Pattern

image1(13)

I had an super awesome fun time making something pretty.  What could be better? First, random circles then…

image2(11)

…messy pleating.  The messy part is not required but it’s just my way.

image3(11)

Grab a short length of rope and…

image4(11)

Wrap string around the rope and pleated piece of fabric.

image5(12)

Till it looks like a cocoon.

image6(10)

You don’t have to have a hole in your glove that turns your hand blue but it could happen.

image7(6)

Dip it in the indigo lots of times so it really gets dark.

image9(4)

Unwrap it, it’s an adventure!  Use a seam ripper or little embroidery scissors and BOOM you’ve made the willow pattern, my current favorite Shibori pattern.

Posted on Leave a comment

Blotch a Day!!

If you missed the blotches last week, I posted them here.  This week (and maybe from now on…haven’t decided) I’ll post them both places.  My blotches are all attention hounds.

Blotch 2-9

That is one proud man.  Here are his origins:

Blotch2/9

He started life as a lowly blotch of Cabernet.  I outlined him and then turned him around and around until I saw where a face wanted to be.

Blotch2-9

He was filled in bit by bit.  I didn’t use an eraser this time and there are a couple of places I would have erased.  But he’s overcome his humble but delicious beginnings.

Posted on 3 Comments

I’m This Quilt’s Paparazzi

I’ve made some slow but good progress on my indigo quilt.  
Making up a quilt as I go along makes me so happy.  I thought I’d just walk through it here because, for some odd reason, people tend to be a little intimidated by the process.
First I cut up some fabric (duh).
I pick a satisfying shape. I like me some diagonals.
Then I add a piece to one side.  I usually pick the diagonal edge because then I can work the panel towards being sort of a square by the time I’m finished with it.
Chop chop to even it up.
Then I kind of cheat by just grabbing a piece of fabric that is larger than I need so that I can cut it down to size later.  
I love to use all the little scraps and so I don’t feel like I’m wasting fabric.
Right sides together and line ’em up.  No, I don’t pin unless I really have to.
I iron all the seams open as I go along.  I love ironing linen.  It can really take the heat.
 Here it is before I cut in down to make it square.
Here’s where I started. I know, I really went overboard on the pictures.  
It’s really more of a rectangle.
I sewed these two together.  
Here’s some more bits about to be added on to a square that’s already pretty far along.  When I pick my little pieces, I always make them longer than they really need to be.
 
Because of the seams, doncha ya know.
See, it’s just long enough after sewing it together and ironing the living shit out of it.  
Chop chop again.
Sew sew again.
 
And there’s one of the square is in all her glory.  I feel like I’m this quilt’s paparazzi.
I just thought I’d add this one last picture. I take great pains to make sure that my seams don’t line up.  One always slips by me though.  I’ve made 10 squares.  I need to make one more and then I can sew them together.  I’ve been so busy that I haven’t been able to commit my regular loony amount of time quilting.  But when I do, I have a blast!
Posted on

I Can’t Stay Grumpy

I’m going to be a presenter at the Wisconsin Book Festival.  Woo hoo!!
I’m going to lead a teen program on making Instant Books.  
Inspired by The Great Good Thing by Rod Townley and How to Make Books by Esther K. Smith; both incredible and inspiring books.  
So, with that in mind, I’ve been making instant books to use as display items.  
Of course, I had to make one out of denim – duh.
 
I picked a randomly sized rectangle of fabric; I went with slightly bigger than a regular piece of printer paper.  I thought that would be easier to work with than, say, a postcard size or a couch size.
 
If this had been regular paper, I would have just folded it, but I get to iron it because it’s fabric.  
I folded/ironed it in half.
 
 Opened it and ironed it in half the other way.
Then, I ironed the edges in to the middle so that it ended up looking like this:

 
Then I folded it like that first fold again.


That gave me this cutting line
 
  Which I cut.  Just to the first horizontal fold
Then I’m going to refer you here (steps E and F), because, using floppy fabric, it was really hard to get an action shot. 
 
But, when finished it will be this shape.
 
Here’s where I was when I ran out of time.  I need to sew these features on (That thing that doesn’t match the rest is another instant book that I made out of paper…clever, huh?) and then I’ll probably sew the rough edges together.  Fun fun fun!
Now, I think we should al collectivley shake our fists at Blogger which made me fight to place these pictures in order.  Grrrr Blogger!  
But, since I’m off to a workshop being run by Lynda Barry (!!!!)  I can’t stay grumpy. 
Posted on

Invisible Stitch Mini-Tute

 Here I’m holding the mitered corner in a death grip so I can make sure it lines up in a nice and tidy way.  I’ve sewn the corners of the binding where I want them as I hand sew this side of the binding to the quilt.  Then I’ll tuck the extra fabric into the corner and tack it shut with a stitch.  I wish I’d taken a picture of that.  I’ll get it next time I make a quilt.
I took some pictures so I could post a quick little tutorial on how to hand sew a quilt binding on, using an invisible stitch.  It always seems like magic to me.  
The binding fabric is folded under just a bit.  I’ve machine sewn the binding onto the other side of the quilt so there is a line of stitching on this side that I need to hide under the binding fabric.  I also try to make sure it looks even across the quilt edge but other than those two things, I’m not very careful
I put the needle into the flannel and follow along the line of the binding, right up close to it, for just under about a half and inch.  I pull it out and…
 then put the needle into the binding right next to where it came out of the flannel and make just under a half inch or so long stitch in the binding – always pulling the thread nice and snug.  I pull the needle out and …
 do it again on the flannel side.  That way the thread is hidden under the fabric and the stitch is invisible.
 I just keep moving along that way all along the binding.  It’s always surprising to me how fast it moves along. 
Posted on

Mitered Corner Mini-Tute

The first place I saw this technique was in Bend the Rules Sewing by Amy Karol.  This is the book that got me sewing again after over a decade; I love it.  I’m sure there are better tutorials than mine all over the interwebs. But I thought (since I took copious pictures of the project) I’d share this tute anyway.  
Quilt corners look hard but they really aren’t. 
 
Here we go:  Machine sewing the quilt binding to the quilt. When I got almost to the corner – say, about a half and inch to a quarter of an inch away I stopped, lifted the need out of the fabric and …
pulled the whole quilt otter there.  I took the rest of the binding fabric and
 folded it straight up at a ninety degree angle…
 Then, I folded it straight down.  The fabric should be right on top of the quilt, hugging the edges. 
 Then I turned the quilt so the edge I was about to sew was lined up.
Then put the foot in about a half to a quarter of an inch down and sewed along to the next corner, where I did the same thing again.  I think I clipped the thread but I really didn’t have to.  When I hand sewed up the other side of the quilt, I tidied up the corners.  Picture of that coming up om my next gratuitous mini tute…stayed tuned!

Posted on

Tutorial on how NOT to make a rice bag